 Ive been wanting to try to make something with leather for a while but to be honest, I was a little intimidated. We have a good friend who makes beautiful leather goods, and I follow several companies on Instagram that do, too, like Stash Co., Bison Made and Convoy Goods. I thought that if maybe I started with something simple, I could ease my way into making something more complicated, like this .
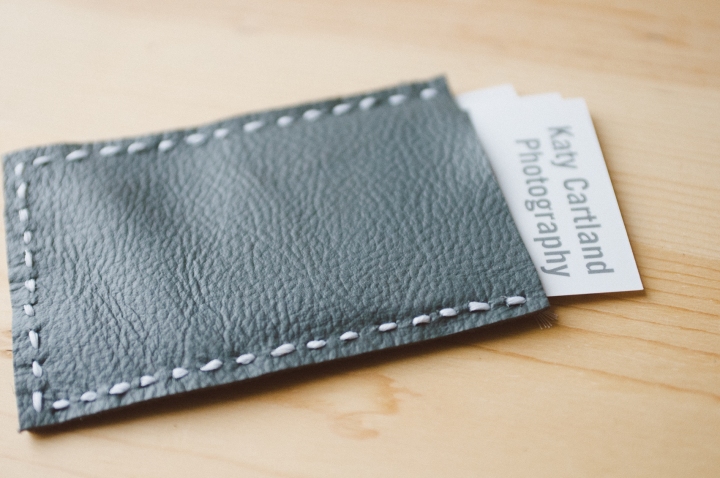
Connor has been wanting a thin leather pouch to carry his business cards, so I decided to start with that. Seemed easy enough – two pieces of leather hand sewn together? I got this! No. Turns out the process was a little more tedious than that.
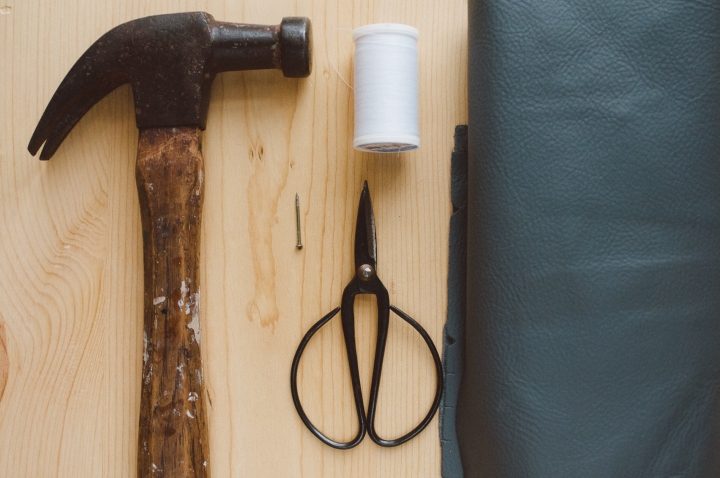 To make the wallet/business card pouch, I used some scrap leather (I found some at a local craft store), regular thread, scissors, a small sized nail and hammer, as well as a service you can nail into. Tools not pictured that you will need are a ruler, a pen or chalk for marking the leather, and a leather stitching needle. If you plan to make a large amount of leather goods, or think this is a hobby you might have for a while, then i would suggest investing in a leather rotary punch.
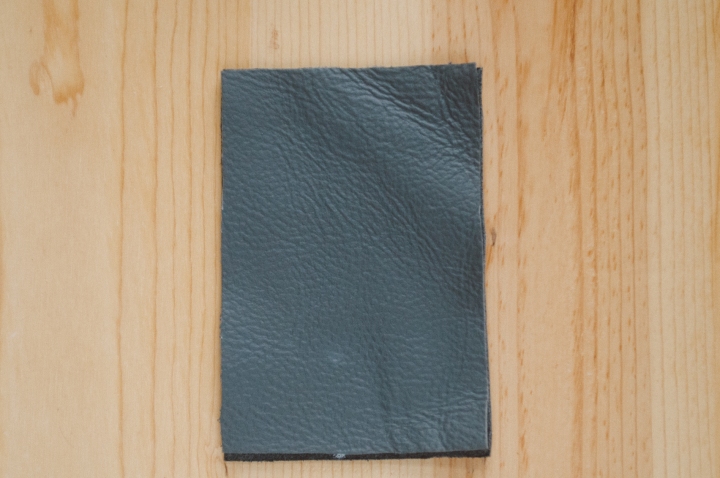 I traced around a business card to get the approximate size wallet that I wanted, leaving a little room on all four sides. Then I traced the border lines with a sharpie pen (using my ruler to attempt accuracy). I did this on the inside of the leather, or the suede side, so that it wouldn’t show. I did this twice to make two identical pieces. After cutting the two pieces out, I trimmed any super crooked edges. It’s impossible to get perfectly straight lines with hand scissors, but hey, it’s what I had to work with.
 Use some sort of clamp – paper clips, binder clips, bobby pins, to hold the two pieces of leather together. All I had were these hair clips – I know it’s a little ridiculous but it’s snowing outside and I wasn’t about to leave the warmth of my home for binder clips. I used the Sharpie pen and ruler to trace 3 border lines, leaving one side open. You will use these lines as a guide to nail the holes through.
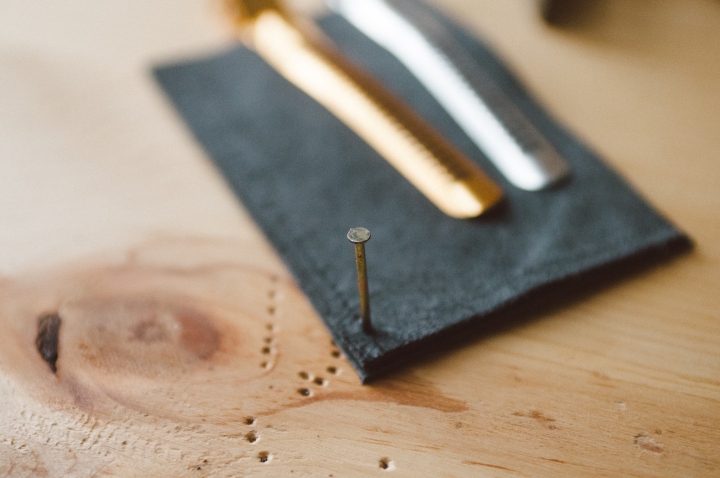 Note that I am still on the suede side. All of the markings are on the inside to keep the leather side clean looking. From here, take your nail and hammer holes all the way through both pieces, until you feel the nail go into the wood. Do this all the way around on the lines you drew, as close together as possible. I got this little tip from my friend Susan who saw my first draft on Instagram. Thanks Susan! It worked like a charm!
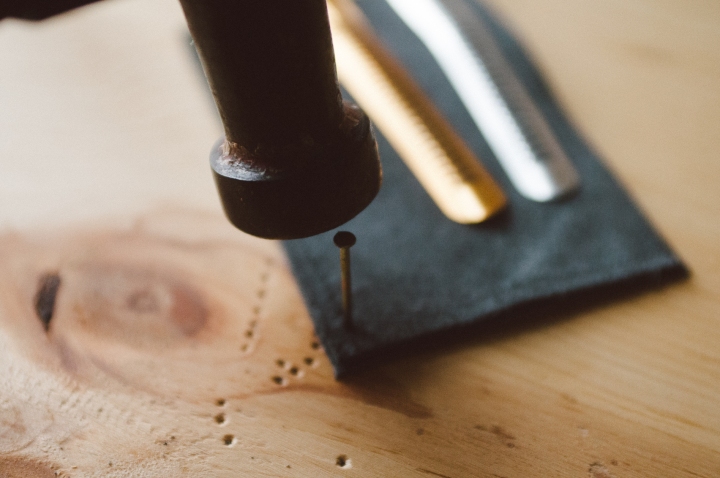 This process takes about 30 minutes.
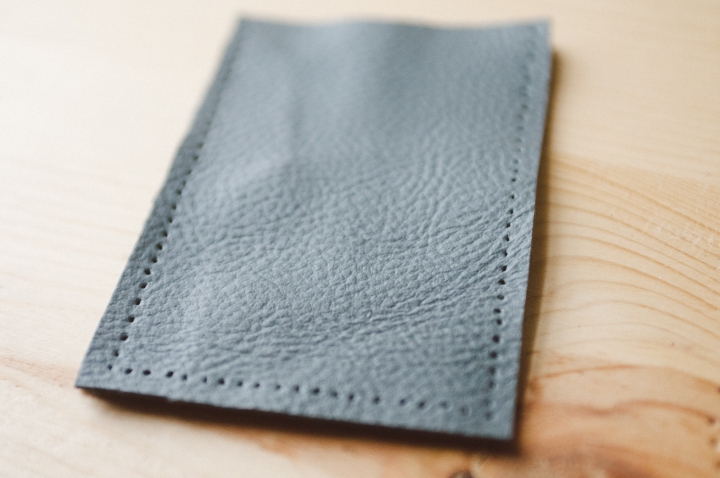 After you hammer all of your holes, flip the pieces of leather right side out. You are ready to stitch the pieces together now!
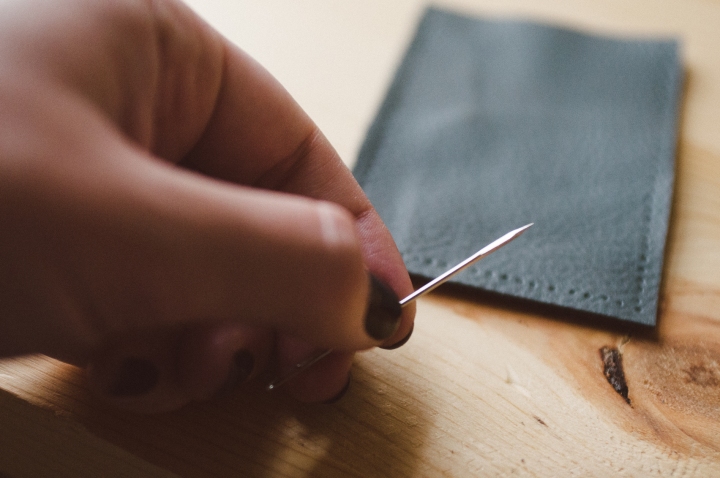 You will need a special needle to stitch leather – you can find a small leather stitching kit at most craft stores. I am using a smaller gauge needle since the size of my leather object is small (I don’t want HUGE stitches on such a small item). I tripled the thread I had and started stitching:
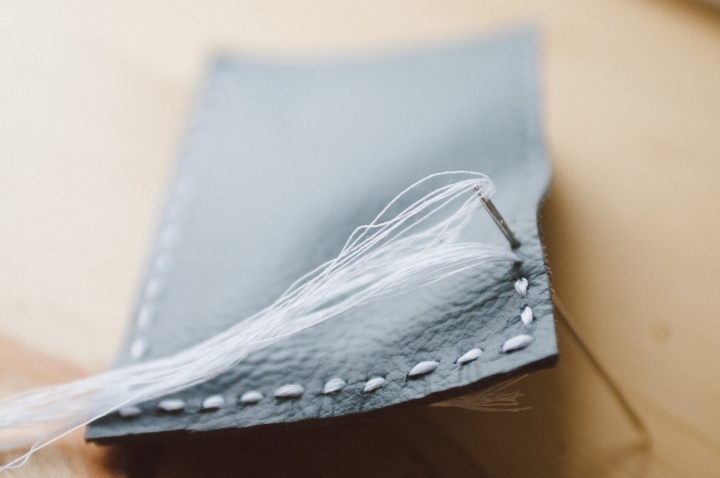 I like the way it turned out, although next time I would probably just double the thread instead of tripling it. I bought some waxed thread to attempt a bigger project next time. Stay tuned for that. What do you think?
 I ordered these beautiful plant orbs from CB2. Technically, they are for tea lights (or at least that’s how CB2 advertises them), but I needed a home for several of my new air plants and decided these would fit.
 I have these hanging now in my dining room in the corner next to a window so that they can (hopefully!) get the right amount of diffused light. I love the simplicity of these orbs. I made a bowl with river stones in this post to display these plants a while back, but I wanted something a little different.


